First Run
Use the unit test that comes with the SDK, ipro_unit_test, to go through one full "build → flash → watch the board's output" cycle and confirm that the computer, probe and board all work; then create your own first application. At the end, ALL TESTS PASSED and then Hello from my_app appear in IPRO Monitor on the IPRO7AI Reef EVK V4.0.
Prerequisites
- IPRO Workbench installed, every row under Environment checked, and the IPRO SDK open: see Install IPRO Workbench.
- An IPRO7AI Reef EVK V4.0 connected through the IPRO Debug Probe, with the probe and its ports shown under Board in the side bar: see Connect the board.
Run ipro_unit_test
-
Select the application. Under Applications in the side bar, click ipro_unit_test (it is in the
testcategory; you can typeunitin the search box).You should see: both the toolbar and the status bar show
ipro_unit_test, and the IPRO Home banner reads "Ready to run ipro_unit_test". -
Build, flash and monitor. Click Build, Flash and Monitor on IPRO Home (
Cmd+Alt+Ron macOS,Ctrl+Alt+Ron Windows). You can also double-click the application in the application list.You should see, in this order:
- IPRO Build in Output shows the compilation and, at the end, lists the usage of flash, ocram and hbnram.
- IPRO Flash shows the flashing progress; the last line is
[All Success]. - The IPRO Monitor terminal opens below, the board restarts, and when the tests finish
ALL TESTS PASSEDappears.
-
Check the status bar and IPRO Home.
You should see: the status bar shows the memory usage, for example
flash 36% · ocram 47% · hbnram 82%; the Application card on IPRO Home also has usage bars. Board in the side bar gets an extra line, "Runs ipro_unit_test (built …)", which means the board is running the firmware you just built.
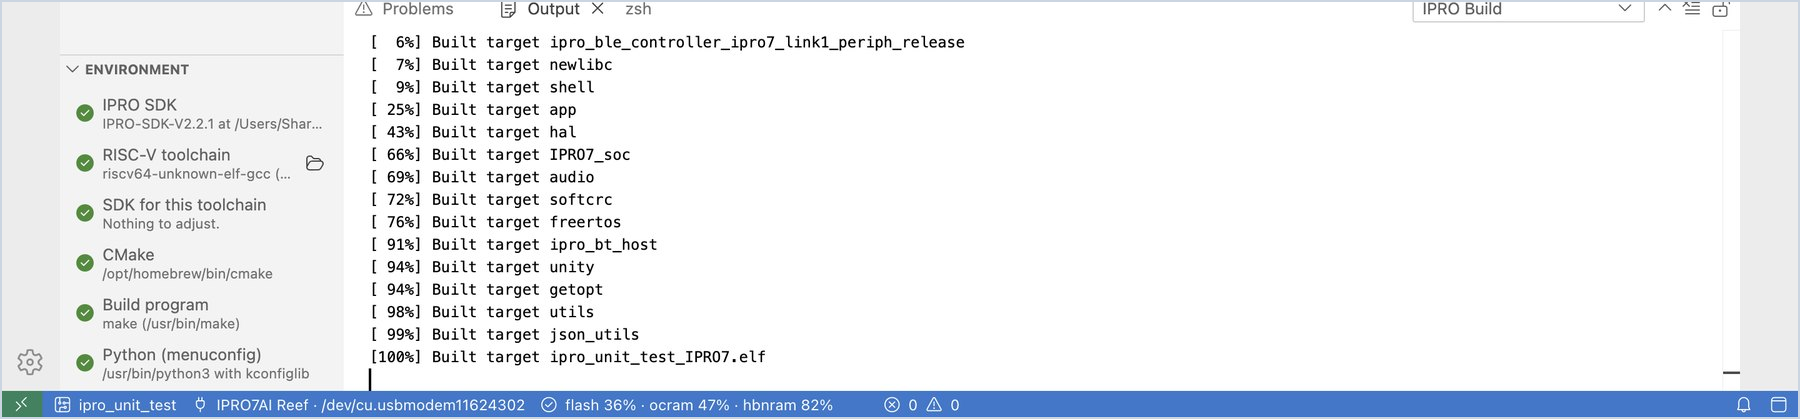
| Output | Contents |
|---|---|
| IPRO Build | CMake configuration and compilation, memory usage, and the size change since the previous build |
| IPRO Flash | The IntelProCube flashing process; on success the last line is [All Success] |
| IPRO Monitor | The board's serial output (a terminal); you can type commands to the board directly |
If any step fails, the IDE stops at that step and shows an explanation with buttons to handle it, such as Go to Error, Retry and Select Port. For common messages, see Troubleshooting.
Tip
To only build, only flash or only open the monitor, use the separate buttons on the toolbar, or the shortcuts: build Cmd+Alt+B, flash Cmd+Alt+U, monitor Cmd+Alt+M (on Windows, replace Cmd with Ctrl).
Create your own application
-
Start a new application. Click + (New Application…) above the Applications list, or New application from a template or an example on IPRO Home.
-
Fill in the form. Under Start from, choose Hello World for a board; under Board, choose IPRO7AI Reef (with the IPRO6S EVK, choose IPRO6S EVK; see Creating an Application for the IPRO6S EVK); enter
my_appas the name, leave the category asuser, and click Create.The name can only contain lowercase letters, digits and underscores, and must start with a letter.
You should see:
user/my_appappears in the list and becomes the current application, and the editor opens itsmain.c. -
Run it. Click Build, Flash and Monitor.
You should see:
Hello from my_appappears in IPRO Monitor.
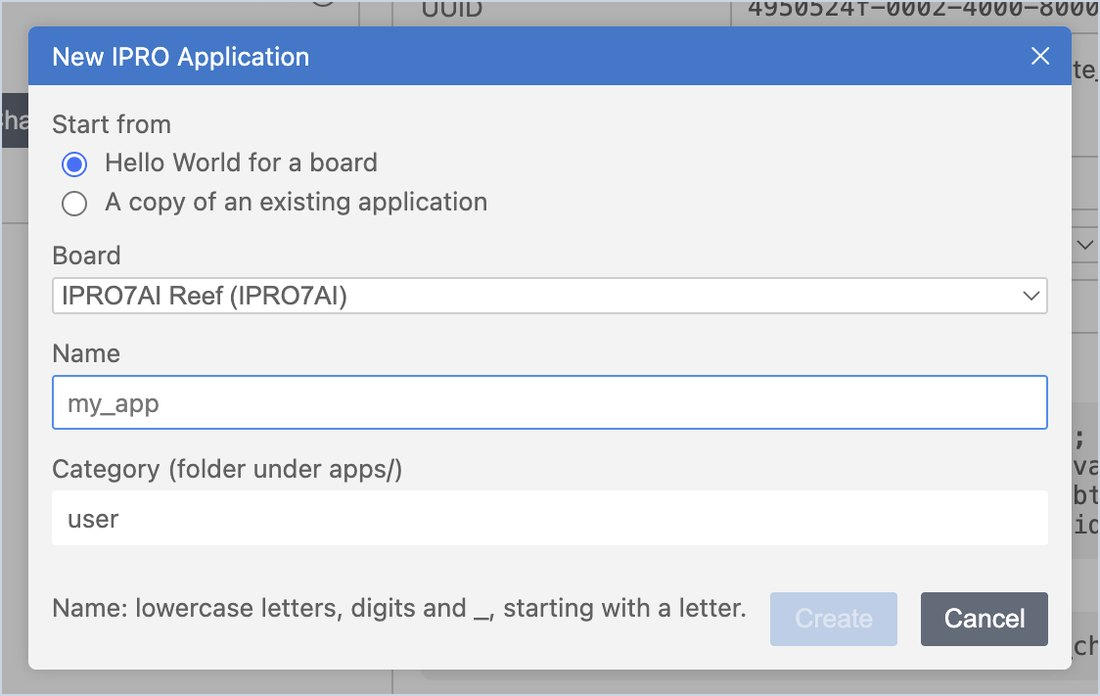
To start from an existing example, right-click the application in the list and choose Copy as New Application…, or choose A copy of an existing application under Start from. The new application goes into apps/<category>/<name> in the SDK.
The application context menu
Right-click an application in the Applications list to do these things directly:
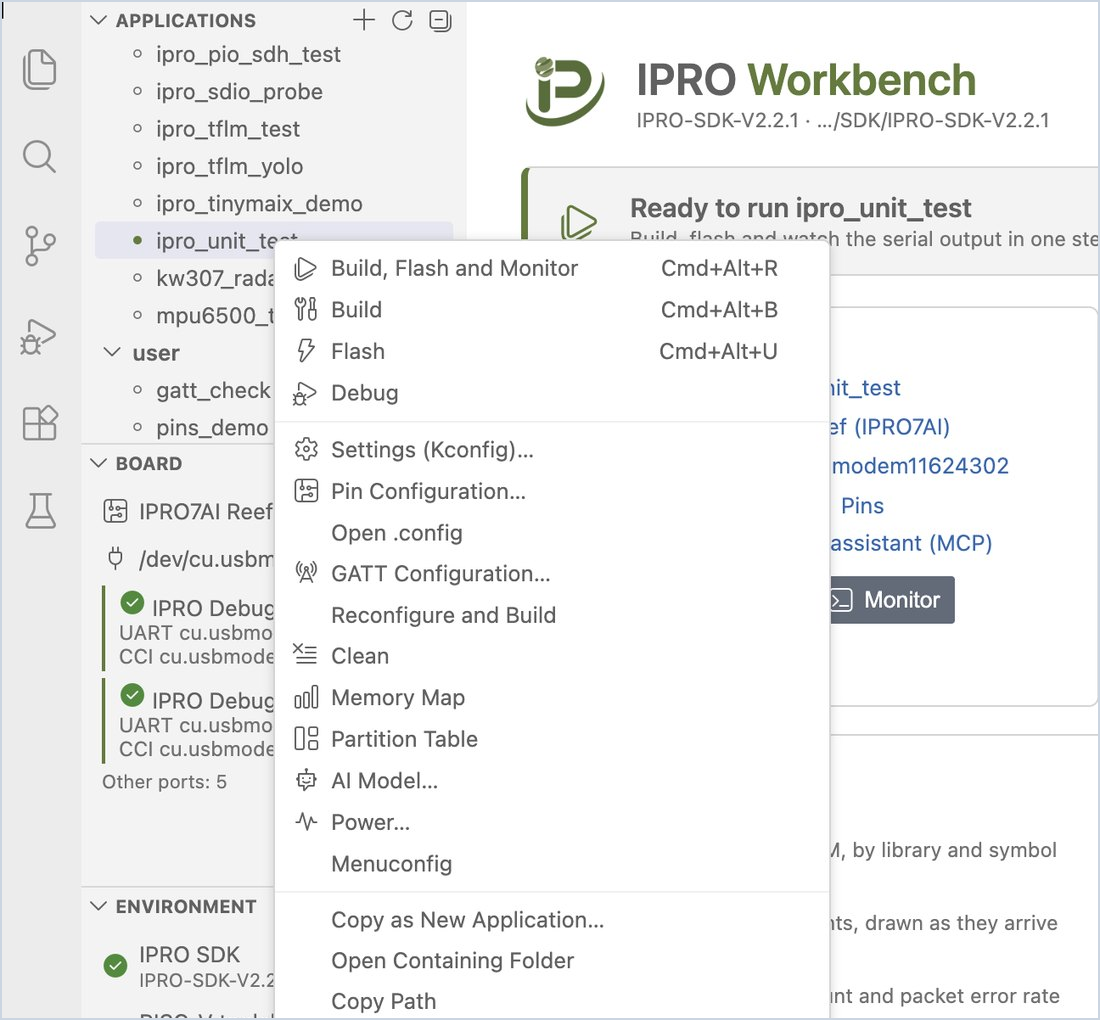
| Item | Purpose |
|---|---|
| Build, Flash and Monitor / Build / Flash / Debug | Same as on the toolbar |
| Settings (Kconfig)… / Menuconfig / Open .config | Change the application's settings; see Develop an Application |
| Pin Configuration… | Assign GPIO functions and generate code |
| GATT Configuration… | Define BLE services and characteristics and generate code; see Configuring GATT Services |
| Reconfigure and Build / Clean | Run the CMake configuration again and build; delete the build results |
| Memory Map | See where the memory goes |
| Partition Table / AI Model… / Power… | See Flashing and the Board and Testing and Measurement |
| Copy as New Application… | Create a new application with this one as the starting point |
| Open Containing Folder / Copy Path | Open the folder in File Explorer (Finder), or copy the folder path |
Next steps
- Develop an Application: settings (Kconfig), pins, GATT services, build errors and where the memory goes.
- Flashing and the Board: what the IDE checks when it flashes, the partition table, AI models and the IPRO6S EVK.
- Serial Monitor: filter, timestamps, logs, the serial plotter and a second port.